|
|
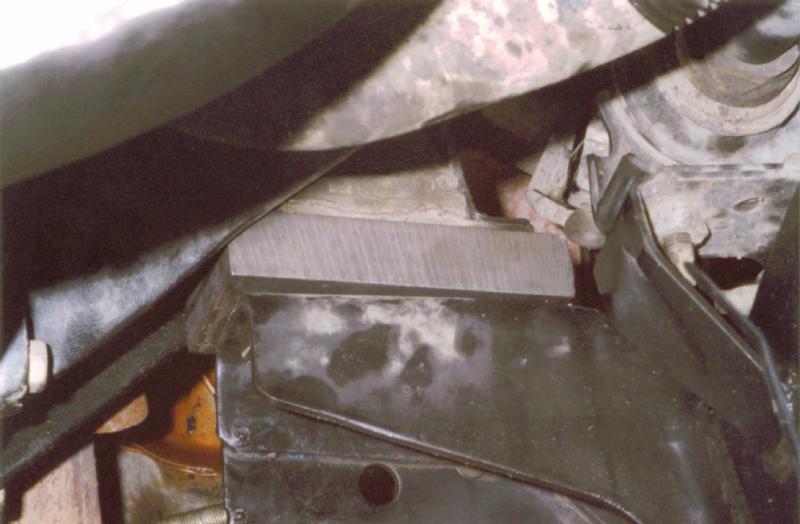
| driver's side spacer block installed |
I learned that the expensive "bombproof" types of motor mount lifts that completely replace the stock mounts
tend to rattle like crazy when used with a 4 cylinder engine. As luck would have it, the less expensive spacer type
motor mount lifts traditionally do not. It didn't take me long to order a 1" solid steel motor mount spacer lift kit
from Goferit off-road out of North Carolina.
First I loosened all 4 bolts on the bottom of the transfer case to allow the engine to move more freely.
Now, it is important to do one mount at a time. I started with the driver's side. For the record: on
each side there is a bolt on the top which screws into a nut welded to the frame, on the bottom there a nut which screws onto
a stud mounted to the motor mount. Both of these get replaced. First, I broke both the bolt and the nut free (with
the help of some liquid wrench). Socket extensions are absolutely necessary.
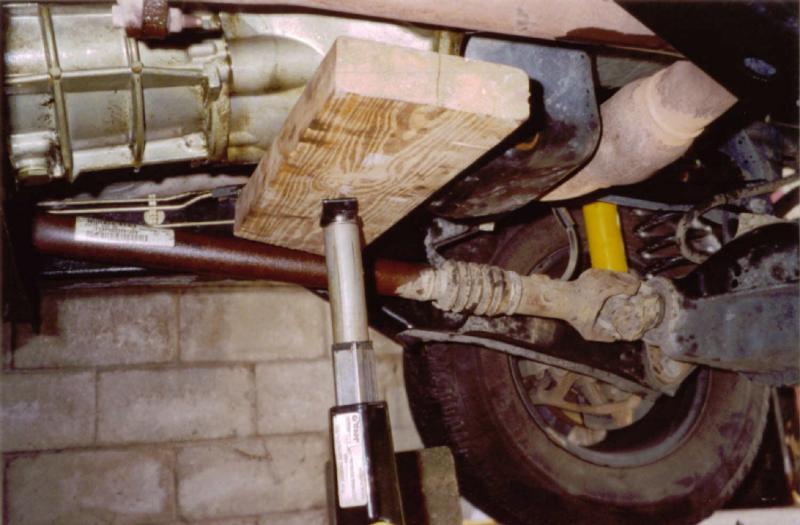
I then used the stock bottle jack on top of a brick to lift the engine slightly. I used the front of the
transmission bell housing (I have heard of people denting their oil pans when using them as jacking points). Of course
I used a piece of wood between the jack and the T-bell housing. Now that the pressure was off the mount, I removed both
the bolt and the nut. I then slowly jacked the engine up until there was enough room to slide the spacer in. Before
I slid the spacer in I had to break out the drill and enlarge the bottom hole in the frame to 9/16" in order to accommodate
the new nut. Safety glasses really helped here. A piece of hot metal didn't feel too good on my neck, I can only
imagine how it would have felt on a retina.
Now came the hardest part, lowering the stud into it's hole in the spacer and lining it up with it's hole in
the frame ALL THE WHILE keeping the other hole in the spacer lined up with the welded nut. The technique I used was
to lower the engine (and stud) slowly until I could thread the new nut onto it. I then concentrated on keeping the other
hole lined up with the welded nut until the engine was completely lowered. I made sure to use threadlock on both the
bolt and the nut. I tightened them both down, moved onto the other side and repeated those steps. I tightened
the snot out of both bolts and both nuts and finally retightened the 4 bolts under the transfer case.
Of the three main procedures in lifting my jeep, the motor mount lift was the one I was most anxious about.
Maybe it was because of some of the horror stories I had read about, maybe it was because I would be doing it alone.
I am here to say it can be done alone with a few tools and the stock bottle jack. Honestly, once I got the technique
down, it wasn't very hard at all. Granted, I didn't have to replace the whole mount and it's a 4 cylinder without an
a/c unit. Anyways, these spacer blocks have straightened out any driveline issues and did away with the minor
vibes that came with my suspension lift. More importantly, not only did I not have to lower the fan shroud after doing my body lift, I also didn't have to install the transfer case shifter relocation bracket. Oh ya, and NO rattles.
|
| lifting up the engine |
|


