 Old Man Emu suspension upgrades are manufactured in Australia and distributed worldwide by ARB. They call
them "upgrades" as opposed to "lifts" because they are designed to give a better-than-stock ride while providing an additional
lift of between 2.5 and 3 inches. Although some vendors package all the necesary components together and sell OME
"kits", there really isn't such a thing as an OME lift kit. There are several off-road shops that sell the pieces seperately.
I put my kit together this way and saved alot of money. I saved $60 alone by not purchasing the transfer case lowering
kit having already decided to opt for a motor mount lift. I ordered the heavy duty springs although they are designed for more weight than I
currently run. I don't regret this and would highly suggest it to anyone out there considering the HD springs with a
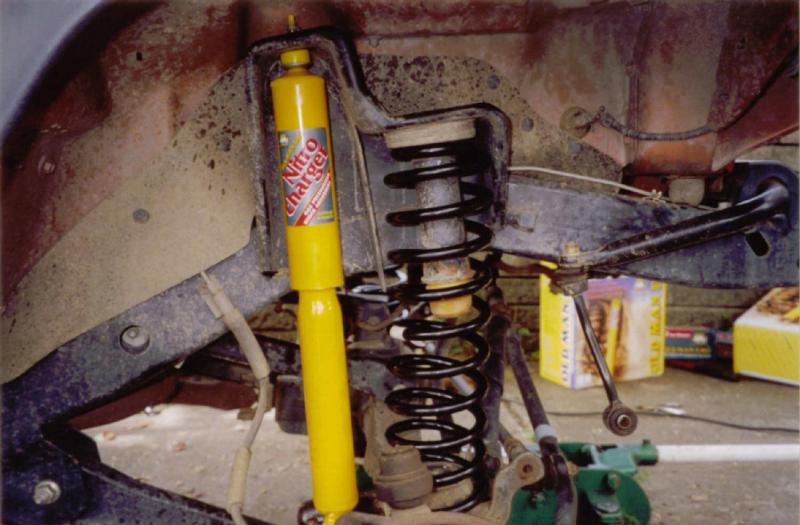
4 cylinder/soft-top/no heavy accessories setup. As far as the shocks, I went with the front
shocks rated for "load" because I don't think anyone actually buys the ones rated for "comfort." There is only one type
of rear shock. I bought bumpstop extensions for the rear springs because I was planning on
running a tire larger than 31" and did not want to over-compress and possibly damage the new coils. Lastly, I bought
the rear trackbar relocation bracket to help re-center the rear axle. That's it.
Thank goodness for the internet. Since I didn't have any directions I relied on the jeep bulletin boards
and personal websites for not only the knowledge on how to do this but why OME was the lift for me and where I could find
the best deal. Here are a few websites with more thorough writeups:
I gotta say thanks to Steve for the floor jack and the piece of pipe that worked PERFECTLY for pushing the snap-rings
into place, John G. for the angle drill, Dave for the jack stands, wheel chocks and big floor jack and especially John
C. for the various tools and all the help!
Assembling the shocks
Looking back, I should have done this beforehand. Without the right stuff this could have been
a real PITA. Each shock comes with a bar pin that must be forced into it's rubber bushing. I took the shock and
placed it's bushing on top of a pipe. The pipe was there to allow the bar pin to come through the other side as
I drove it in with a big freakin' hammer. Once the bar pin was all the way in I had to secure it with
a snap ring. I had snap ring pliars which made it easy to open it up and slide it onto the bar pin. The snap ring
had to now be forced into a groove on the bar pin. To do this you must use a piece of pipe or a deep socket that is
just slightly larger than the bar pin. I had a piece of pipe that slid over the bar pin like butter, I gave it a couple
whacks with the BFH and the snap ring locked down into place. Since I had read of several people's snap rings coming
off, I had squirted some threadlock into the groove before this.
Front end
I started with the front end because I had never done this before and wanted to
start on the end WITHOUT the trackbar relocation bracket. I set the parking brake, put it in gear, put the transfer
case in 4wd and placed wheel chocks behind the rear tires. After loosening the lugnuts on the front wheels I placed
a large floor jack under the front differential and started jacking it up. The front diff is not centered on the axle
so while lifting it, one wheel starts coming way off the ground while the other hardly moves. Once I had it
high enough I placed jackstands under the frame behind the lower control arms and let the jack down. It was time to
remove the shocks. For the top I used a pair of vice grips to hold the post while I removed the bolt with a wrench.
On one side, I hastily gripped the post and ended up rounding it off. We needed to break out the air chisel to break
that nut free. I believe tightening down a crescent wrench on the post would have worked better than the vice
grips. Removing the two bottom bolts was simple with an extension. Once the shocks are off the axle drops
down on each side, now it was time to get the stock springs out. This is where I took another smaller jack
and placed it under the brake disc on side and jacked it up. I then stepped on the other side's brake
disc allowing enough room to pull the spring out (I didn't have spring retainer clips on either side). This technique
worked fine for getting the stock springs out but, much to my chagrin, it would not work for gettting the new taller
OME springs in. The problem was that the front end was not sitting high enough to let me fully press that brake disc
down (it was hitting the ground). If I had been using really tall jackstands and obviously a jack that could accompany
them I'm confident I could of squeezed the new springs in with the "jack up one side/step on the other" method.
However I wasn't, so it was a quick trip to the auto parts store for spring compressors. I should now mention that there
is some confusion about how OME springs are installed. Since they are manufactured in Australia for right-hand
drive vehicles and are infamously tagged in different ways sometimes you need to swap the springs. The consensus has
been that you put the taller front spring on the driver's side and and taller rear spring on the passenger's side. For
the life of me I could not see a difference in the front springs but the rear spring marked RH was obviously taller than the
one marked LH. Because of this, I installed the front springs as marked with the spring compressors. They sort
of screwed into place. After installing the new shocks I threw the wheels back on and let the jeep down.
I then reconnected the swaybar and tightened the lugnuts.
Rear end
Since the rear differential is centered on this axle, getting it onto the jackstands was much easier.
Shock removal was easy but would have been impossible without an extension. Pulling out the stock springs was ridiculously
easy and didn't require much effort, let alone jacking. After disconnecting the swaybar I removed the rear trackbar
and set it aside. Now it was time to install the rear trackbar relocation bracket (see below). I then removed
the bumpstop, installed the bumpstop extensions and squeezed the bumpstop back into place. Next I re-attached the trackbar,
lifting up the diff helps to align the holes. I then used the old "jack up one side/step on the other" method to insert
the OME springs (no spring compressors necesary). I reconnected the swaybar, installed the new shocks, put the wheels
back on and let 'er down.
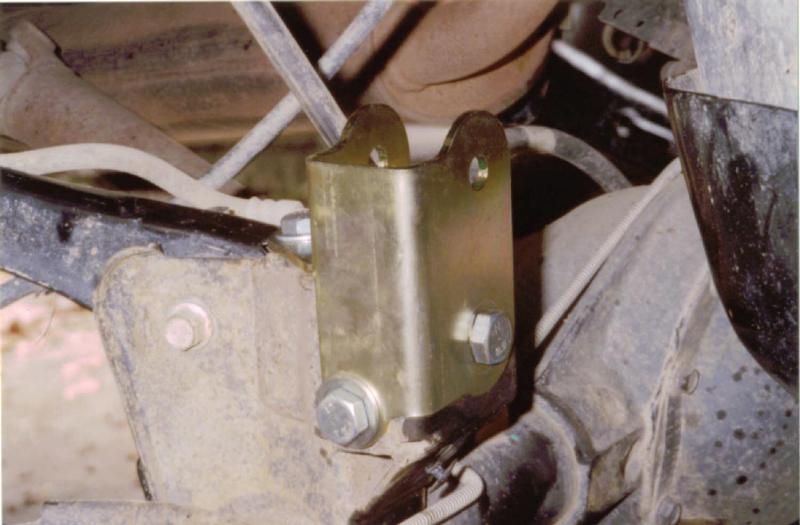
Trackbar relocation bracket
Yes it's true! This is indeed the toughest part of the install. This bracket is designed
to re-center the rear axle by mounting the driver's side of the trackbar a couple inches higher than it's stock location.
Without it, obviously the axle will be slightly off center but the driver's side wheel can also be dangerously close
to the spring perch. Although I have recently read that this thing may be more trouble than it's worth, I'm glad
I took the time to put it on. First I ripped off the plastic cover on the driver's side trackbar mount.
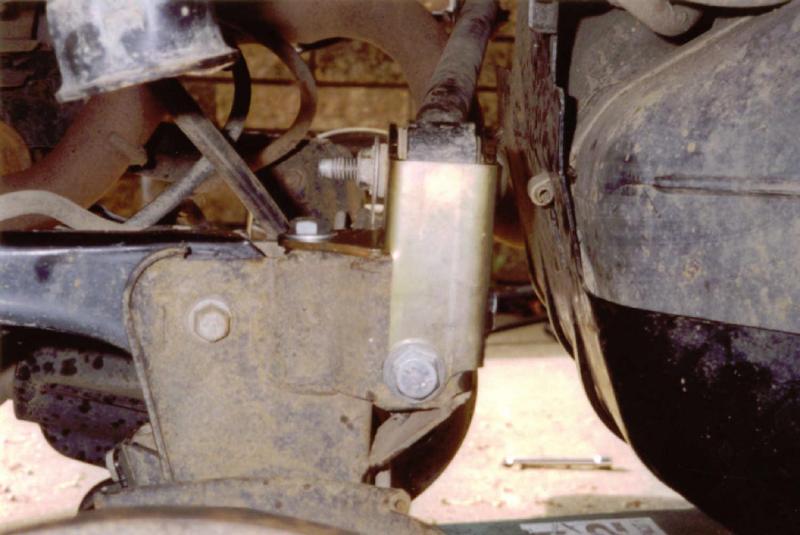
I then temporarily installed the bracket with the large bolt and used it as a template to drill the 2 pilot holes. Next
I removed the bracket and drilled the top hole to 7/16" and the bottom to 1/2". Because the top hole comes
so close to the edge and there is so little room to work with, an angle drill came in real handy and was almost necesary
in my opinion. Now came the hard part. Getting the washers and nuts onto the bolts and tightening them down.
This was similar to the cramped space (often blind) frustrating install the rear tow hooks were...multiplied by 3! You sort of have to do it to understand. All I can say is two sets of hands definately
helped and my "duct tape inside the box wrench" technique came into play yet again. I was sure to use threadlock
on all 3 bolts.
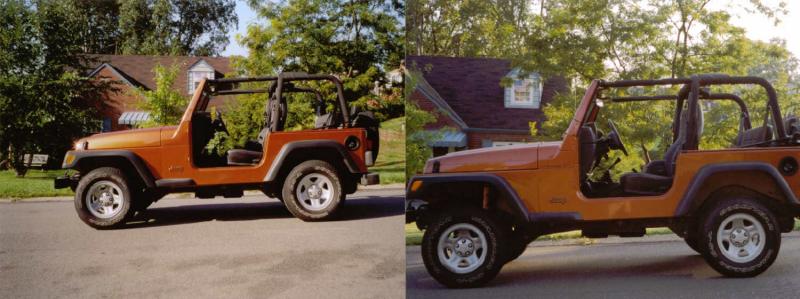
Final thoughts
The new springs and shocks gave me close to 3" of lift. The rear passenger's side is just a
bit higher than the rear driver's side. Once the springs settle and once I add a larger spare, swingout tire carrier,
and other accessories (more weight) it will level out. The only vibes I had were slight, almost unnoticeable ones
when accelerating in 1st gear (especially on a hill). The motor mount lift has taken care of those. I had death wobble when hitting rough pavement at 45 mph or faster. This was due to the
alignment (or lack thereof). The steering wheel was slightly off-center. This was easily fixed by adjusting the
drag link.
The ride is better than stock. Combined with a body lift I will be able to run 33" tires effectively. The install took about 8 hours and was more time consuming than difficult. I saved a fortune doing
it myself and learned alot about my jeep in the process.
|
| rear trackbar relocation bracket |
|
| rear trackbar connected to the new bracket |
|